ColorWheel: where power meets simplicity
Want better color in your images? Then ColorWheel is the tool for you. Sophisticated and dynamic, while beautifully simple to use, it provides maximum control and brilliant results.
Because ColorWheel is part of DxO PhotoLab seamless RAW workflow, any changes you make to hue, tone, and saturation are of a much higher quality than when editing lossy JPEGs. Put simply, there’s more data in a RAW file to work with, so changes can be made with greater strength and fewer artifacts such as fringing or loss of detail.
Easy to see means easy to use
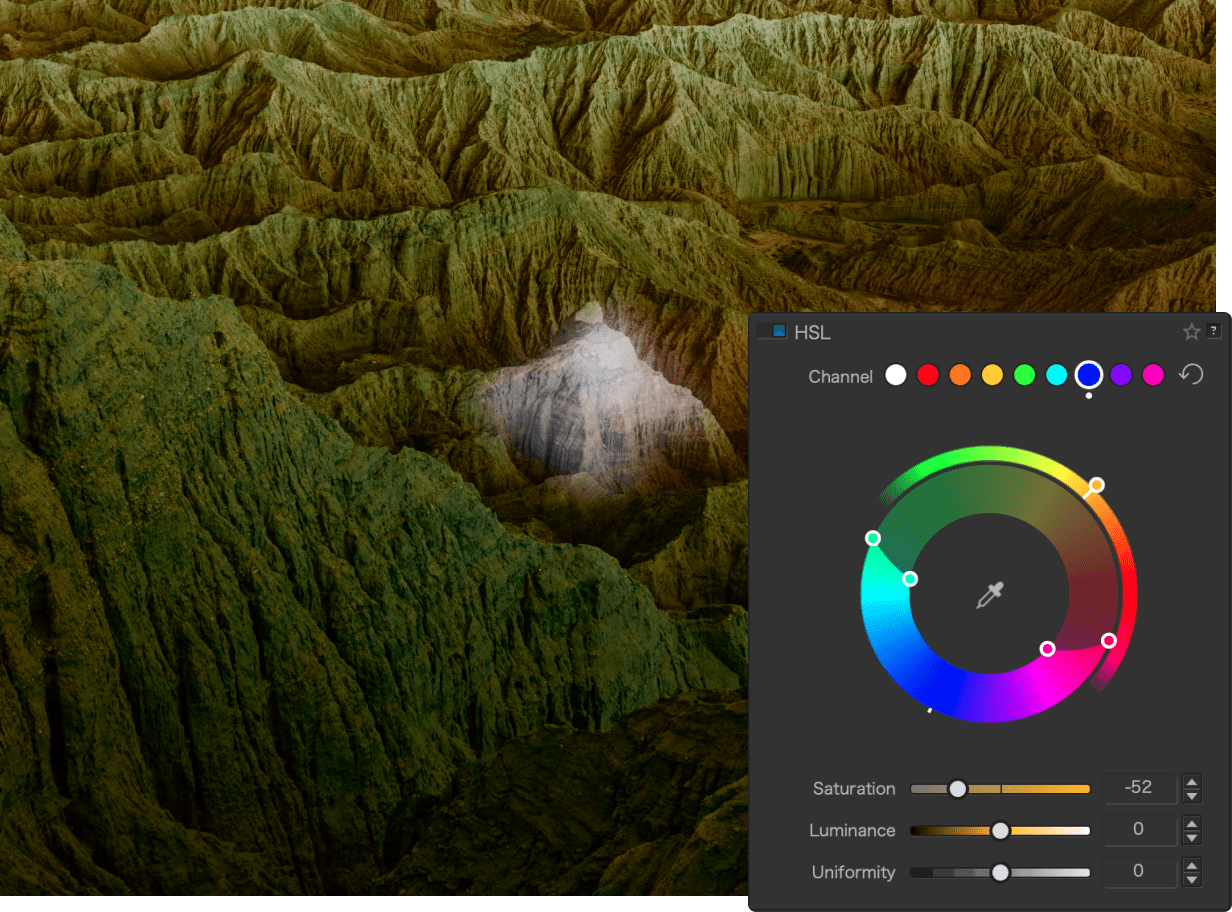
One of ColorWheel’s greatest assets is how visual a tool it is. Unlike other RAW processing software, the colors you choose are clearly highlighted on the wheel, so
Choose colors with a single click
To select a color range,
You can then
Quick, accurate refinements
If the affected area isn’t quite working, each of the
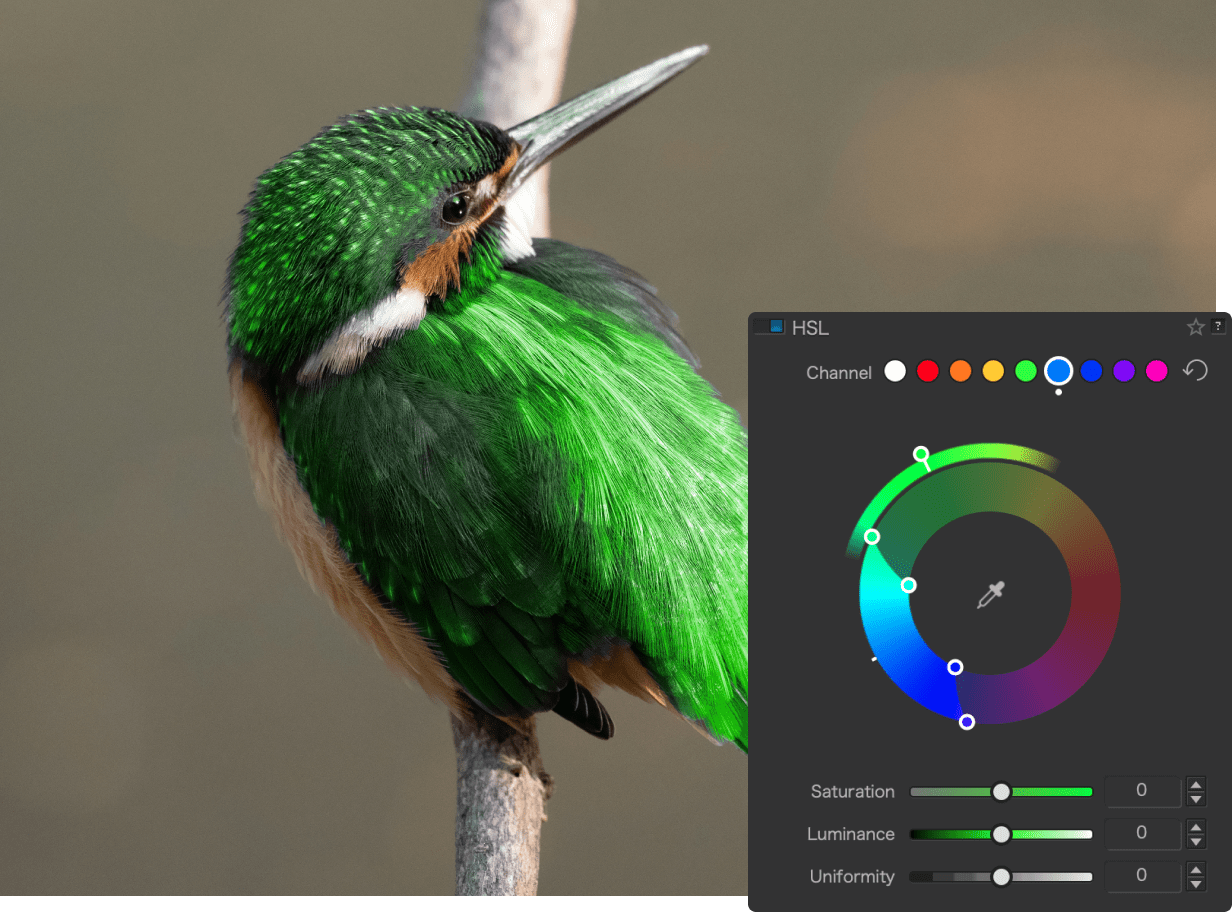
This kingfisher looks a little different as some of its aqua tones have been shifted towards green.
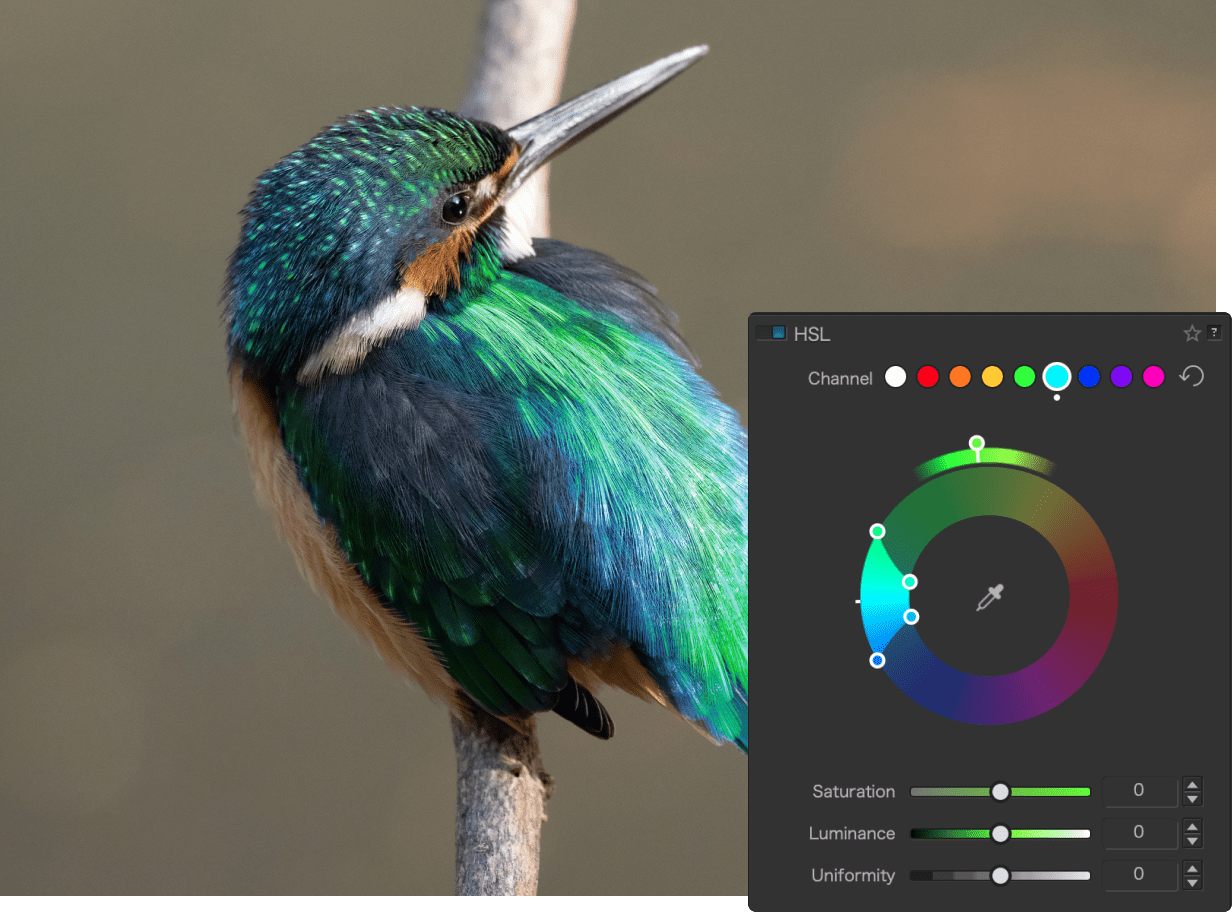
To capture more of the blues, adjustments are made by
How to use the Saturation, Luminance, and Uniformity controls
As well as shifting the hues of selected colors, you can change their
Remember, when the white / global channel is selected, you’ll only have access to the Saturation slider.
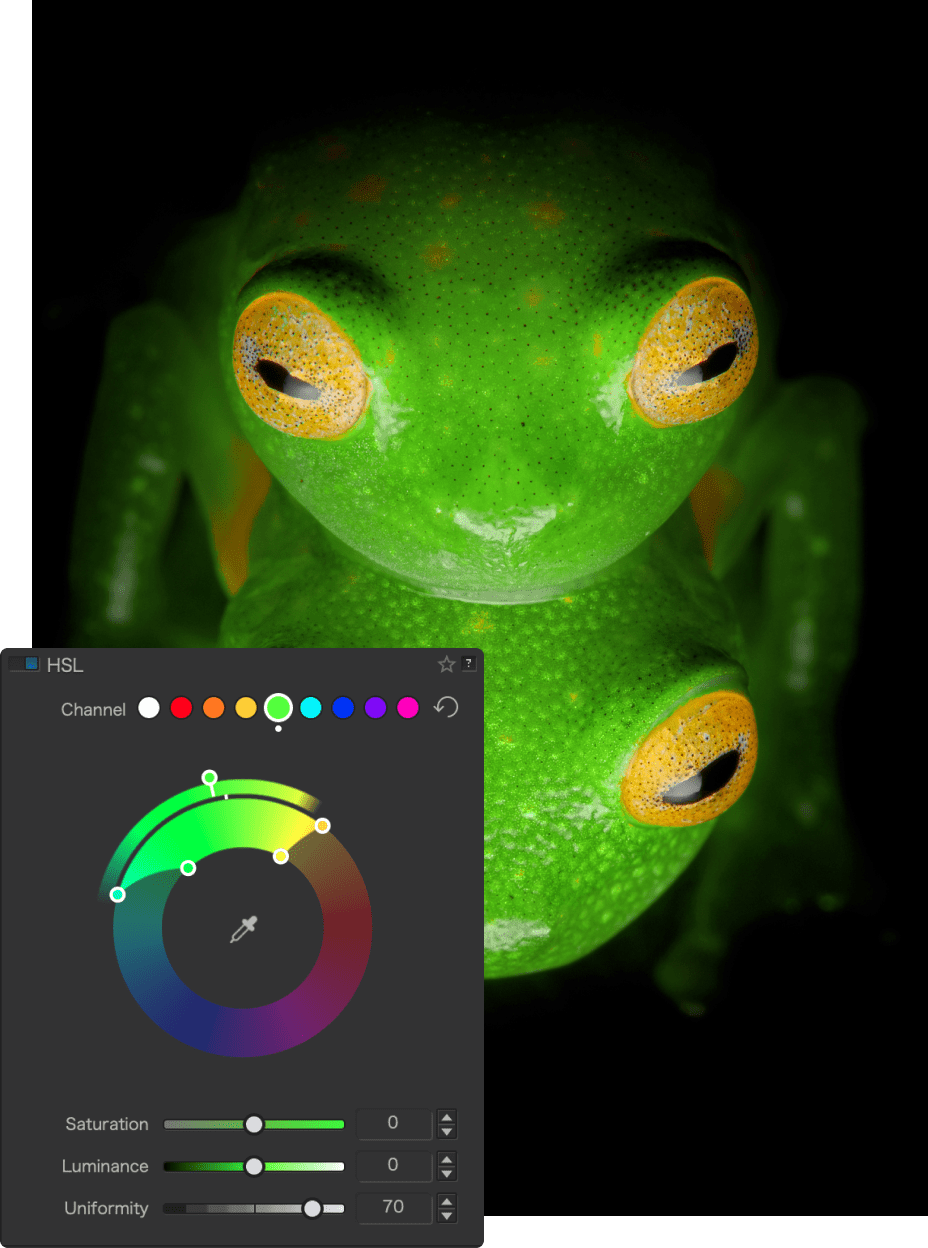
The third slider — Uniformity — is something different.
Slide it to the right to increase the Uniformity and the selected colors will have their hues pushed closer together, making adjustments more uniform. Slide it to the left to decrease Uniformity and the selected hues are pushed further apart, so adjustments are more varied.
Sliding the Uniformity slider to the left will push your selected colors further apart, introducing more individual hues. This can be useful when you want to ensure that all the contrasting shades that you observed felt present when taking the photo are clear to see.
This frog has more shades of green — bringing out more of the yellow tones present — when the uniformity of the green channel is reduced to -70:

However, those greens look homogeneous when the uniformity is increased to +70.
Increasing uniformity is
Control every color
DxO PhotoLab’s ColorWheel is both
DxO PhotoLab 9
RAW photo editing at its finest